Setting up HipChat integration
- Lenny Emmerton
Owned by Lenny Emmerton
Last updated: May 03, 2017
Step by step guide
We recommend you create a specific user for Elevator for JIRA in HipChat to create the required API Key. This negates the issue of individuals who create API Tokens leaving the company and closing their HipChat accounts.
Create a new user invite in HipChat
Please note
You must be an Administrator in HipChat
- Log into your HipChat web portal https://{yourcompanyname}hipchat.com and select Group admin on the top main menu

- Once in Group Admin select Users form the top menu

- Enable the Invite URL and copy the provided link
- Paste this Invite URL in a new browser window
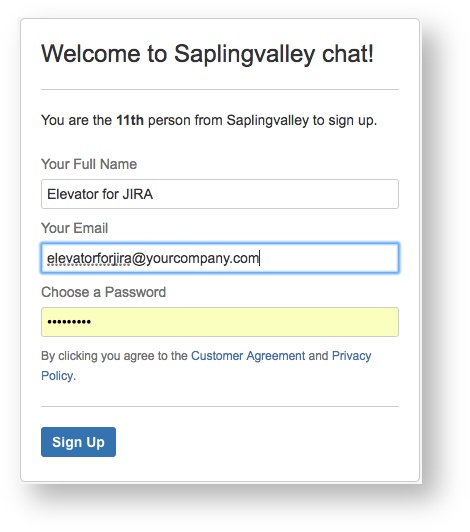
Create a Elevator User Profile in HipChat
Add Elevator for Jira as a user, we suggest you enter the below fields with:
- Your Full Name: Elevator for JIRA
Your Email: elevator@yourcompany.com
Note
The email address does not need to physically exist- Enter a password and store this password
- Select Sign up
Create an API Token in HipChat
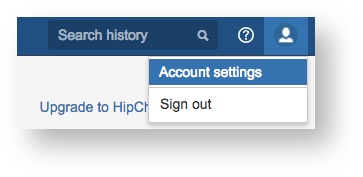
- Once signed in, go to the user profile by selecting the User Icon
 on the far right and select Account Settings
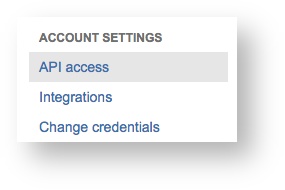
- From the left hand side Account Settings menu select API Access
- From this page enter a label and select the Scopes Send message and Send Notification and select Create
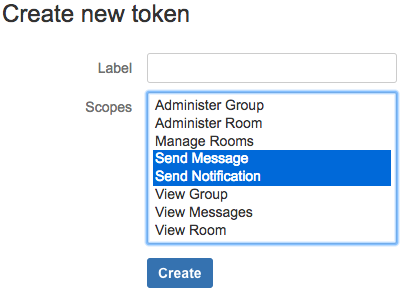
- Copy the created Token ID

Notification Channel Setup
- From the JIRA menu bar select the Rosters menu.

- Return to your Notification Channels in JIRA by selecting:

Administration Access
The user must have JIRA administration access to setup Global Configuration
- Select HipChat as a type and enter the API URL and select CREATE
Note
If your HipChat instance is cloud based then you can use the default address.

Success!
Congratulations, you've now setup HipChat. Need to integrate slack, Email or a Webhook? Please see below.
Setting up individual users to receive HipChat notifications
- Please see Setting up My Notifications
Setting up team rooms to receive HipChat notifications
- Please see Setting up team Notifications

, multiple selections available,