Setting up My Notifications
- Lenny Emmerton
Owned by Lenny Emmerton
Last updated: Jan 12, 2017
Step by step guide
Your Notification Setup
- From the JIRA menu bar select the Rosters menu.

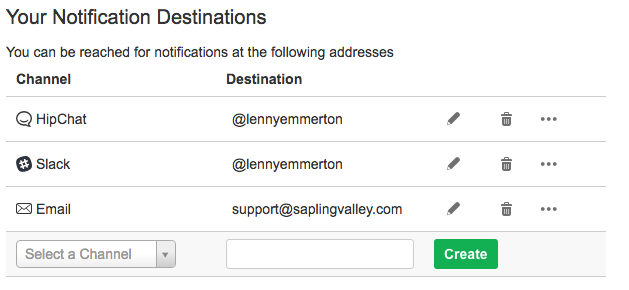
- Select
 on the far top right hand side
 - Select your Channel and enter your destination details and select CREATE. Note: a test message will be sent on creation
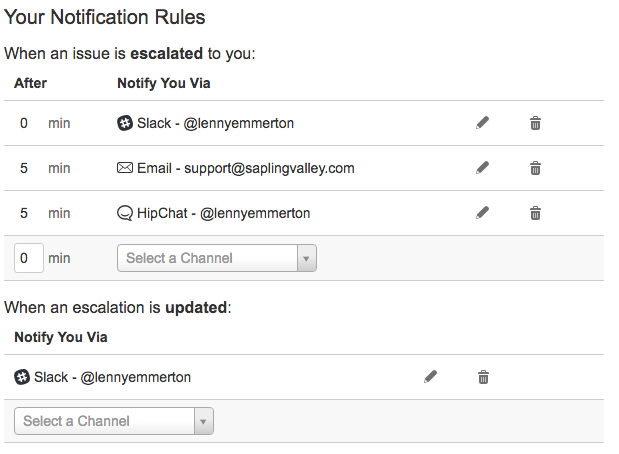
- Complete your escalation rules by adding an After entry (When you will be alerted) and the notification type
Success!
Congratulations, you've now setup up your notifications! Your issues will track you down like a fugitive.

, multiple selections available, Use left or right arrow keys to navigate selected items