Step by step guide
- From the JIRA menu bar select the Elevator.

- On the far right hand side under the action heading select Edit for the roster you need to edit.

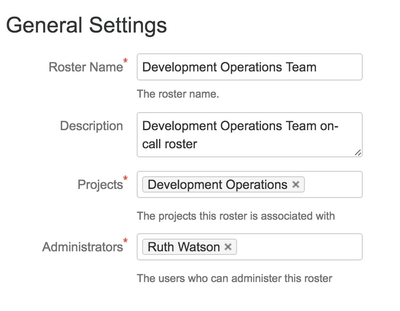
Edit General Settings
Fields - Roster Name: If edited this will appear within the JIRA issue as a drop down selection for escalation.
- Description: Edit the description of the Roster group and their function.
- Projects: Search and edit projects that can use this roster.
- Administrators: Search and edit users that have permission to change the roster.
| |
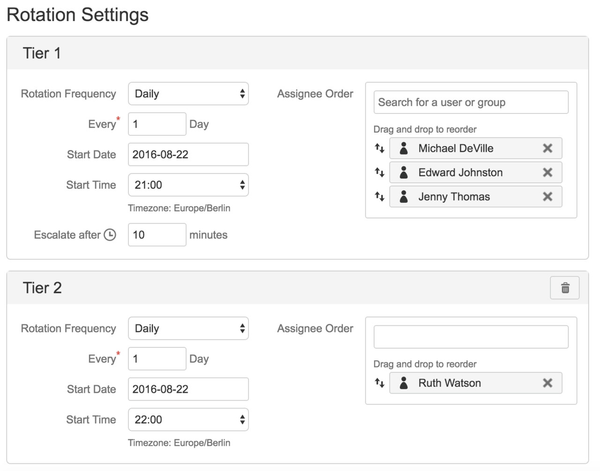
Edit Rotation Settings
Fields - Assignee Order: Search and edit the users in your roster group. You can drag and drop them once all your users are selected to change the escalation cycle i.e the user at the top of the list will be 1st in the escalation cycle of your roster.
- Rotation Frequency and Every: Edit the frequency of when users will rotate through the roster. E.g. Set the Rotation Frequency as daily and the first escalation user in the roster will be on-call for 24 hours.
- Start Date & Start Time: Edit the date and time you want the roster to start. Dates/Times entered here are relative to your JIRA user's configured timezone. See Choosing a Time Zone in the JIRA documentation for more information
- Escalate after: Edit the amount of time before any unacknowledged escalations will be automatically escalated to the next tier
|
|
View edited Schedule
For reference when editing, the Roster Schedule will display the previous roster and the new roster.