Setting up a Team Allocation roster
Recommendation
We recommend instructing your JIRA Administrator to set up Notification Channels before creating your roster.
Step by step guide
Roster Creation
- From the JIRA menu bar select the Rosters menu.

- On the far left hand side select:

- From the Roster Type page select 'Team Allocation Roster'
General Settings
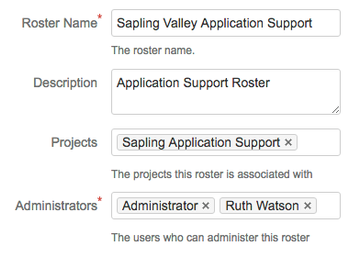
Complete the fields:
- Roster Name: Enter a roster name aligned to the team function. This will appear within the JIRA issue as a drop down selection for assignment.
- Description: Enter a description of the Roster group and their function.
- Projects: Search and select projects that can use this roster.
- Administrators: Search and select users that have permission to change the roster.
Team Workload
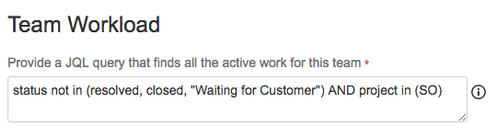
The team workload JQL query is used to understand the current workload of your team and assign new issues to the correct users.
Elevator for JIRA will use this query to count the issues that are already assigned to team members and factor this in when allocating work.
Example: If a team member has an issue assigned to them that belongs to the project Sapling Operations (SO) and that issue is not in a status of resolved, closed or Waiting for Customer then it would be counted against the number of issues already assigned to that team member.
Automated Reassignment
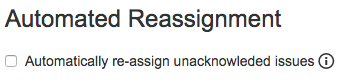
Automated Reassignment allows issues to be automatically re-assigned within on call teams after a defined period of waiting for acknowledgment. With this turned on, team members must acknowledge issues via the Elevator panel on the issue.
If ticked the 'Reassign if unacknowledged' will appear as an option in the Workload section within Rotation Settings. Issues will then be reassigned if the assignee does not Acknowledge the issue in a defined time.
If unticked issues will remain with the allocated assignee until completion.
Acknowledgment of Issues
By default this setting does not affect team workload calculations.
If you would like to adjust team workload based on acknowledgment you can use the EscalationStatus custom field that Elevator sets on each issue. See The Escalation Status custom field.
Rotation Settings
Enter the team name

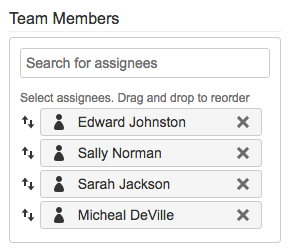
Add your Team Members
In the Team Members section search and select the users that will become your team. You can drag and drop them once all your users are selected to order the assignment cycle. Please read the Important message and Tip below.
Important
The users you select need to be active users with the required assignable permissions for the project(s) you add to the roster
Team Order
The user order is important if the workload distribution is set to Targeted and Cyclical. The targeted user allocation function will cycle through this list.
Choose a Workload Allocation
Need help selecting a Workload Allocation?
Please see to Selecting a Roster Type for more information on how each allocation option behaves.
Targeted Workload Allocation
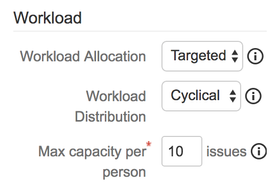
For Targeted you have the options of Max capacity per person and Workload Distribution
- Max capacity per person - Set this to the maximum desired workload per team member can receive. Once a team member is at capacity issues will be assigned to the next team member. Once the entire team is at capacity work will be queued. As staff complete issues new work will be automatically assigned from the queue to keep them at an optimal workload
- Workload Distribution - Choose the Workload Distribution of CYCLICAL or RANDOM
- CYCLICAL will select the 1st team member positioned in the Setting up a Team Allocation roster#Team Members section and cycle through this list in order as the shifts change each day.
- RANDOM will randomly select a Team Member as the Target for work allocation and randomly select another team member as shifts change
- FIXED will always choose a targeted assignee in their listed order.
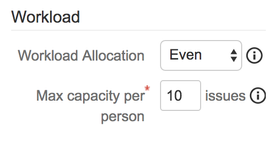
Even Workload Allocation
Even workload allocation will spread issues evenly across team members during the shift and while the shifts overlap to the next service team.
Set Max capacity per person the maximum desired workload per team member. Once a team member is at capacity issues will be assigned to the next team member. Once the entire team is at capacity work will be queued. As staff complete issues new work will be automatically assigned from the queue to keep them at an optimal workload
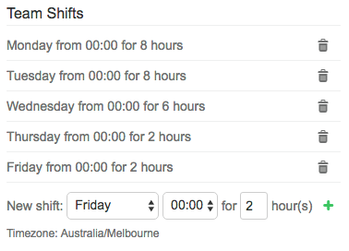
Team Shifts
If required you can set Team Shifts. This allows you to create a specific set of time windows for which a team is available to receive work.
For example if the team only works 5 days a week, 8 hours a day starting at 9 am you would enter 5 teams shifts to represent Monday to Friday starting at 09:00 for 8 Hours.
If the team is 24/7 then leave Team Shifts empty.
- To set Team Shifts select
- Select the Day, time the shift starts and the shift duration
- Select
 to add the entry or
  to remove the entry
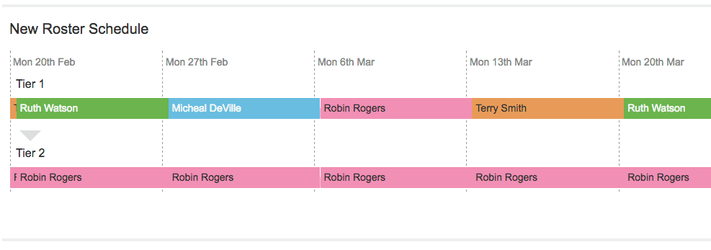
Roster Schedule
The Roster Schedule will update in real-time to show you the effective roster as you configure.
Notifications
Now your roster is created you can configure additional notifications
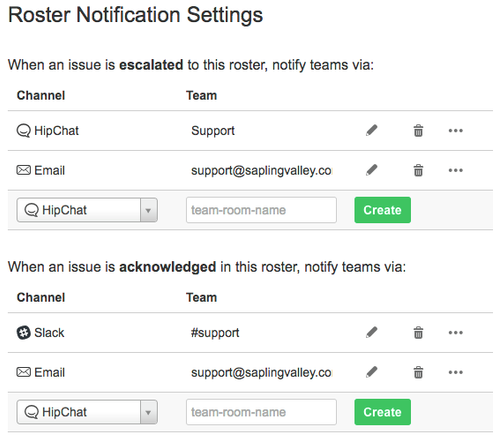
Roster Notification Settings
You can configure notifications to be sent to teams when issues are actioned by Elevator for JIRA. Note: Notification Channels need to be setup before notification setting will have selectable options.
- Select your notification channel type and enter the correct destination address and select CREATE
- A test message will be sent to the room or channel provided
My Notification Settings
Please advise users assigned to the roster to set-up their notifications by selecting  on the top far right. Please see Setting up My Notifications for help.
Success!
Congratulations, you've now setup your first Team Allocation roster!